

Follow us on:

You don’t need to be a graphic artist to know if the file your client sent is good to use for apparel decoration. You don’t need Photoshop either. Fact is, anyone with a computer can check the quality of a digital file for screenprint, embroidery, or DTG printing.
Looking at client art files is easy using our step-by-step instructions. This article will provide the basic things you need to know about file types, getting set-up to view them, and how to know if they are a good quality for use.
Contents:
- Before You Begin
- Basics of Raster File & Art Requirements
- Getting Set Up
- How To Review An Art File
- How To Know If A File Will Not Work
- Resources
Before You Begin
- If you're new to digital art files you may want to get a little background on file types and art requirements.
- Download the sample files to follow along on your computer.
- The information in this article is also available as a pdf download that can be saved or printed.
- Be familiar with the basics of raster files and art requirements for decoration.
Basics Of Raster Files & Art Requirements
Whether you are ordering screen print, embroidery or direct-to-garment printing, you will need one of two file types: either a high resolution raster file or a vector art file. The file types are very different and are reviewed differently. This article looks at raster files specifically.
Raster images are made up of individually colored dots, called pixels. Scans or photos taken on your phone or a digital camera are raster images. If you zoom in closely, you can see the pixels that make up a raster picture.

Art Requirements
The image quality of raster files is measured in dots per inch (dpi) or pixels per inch (ppi). Files that are good to use have been created at a minimum of 150 dpi at the size the image will print. In other words, if your design is supposed to print at 10 inches wide, the design must have been created at a minimum of 10"wide at 150 dpi.
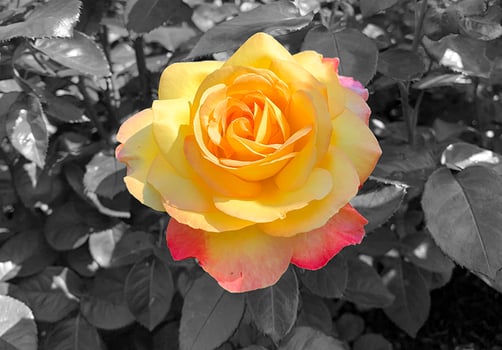
You can always make a raster file smaller, but you can’t make it bigger. Image quality is based on the resolution used when the file is made or photo is taken. A high quality art file that is good for use will look smooth and clean (below left). An image that is low resolution will look chunky and pixelated (below right).
![]()
Some common raster file formats are .psd, .jpg, .png and .gif. Files with these file extensions are raster and can be viewed using the steps in this blog. Other file formats that can be raster images are .pdf and .eps, but it is important to note that these can also be vector files and may need to be reviewed differently.
Getting Set Up
There are plenty of online programs that work a lot like Photoshop and are available for free. A trusted pioneer of such software is GIMP (stands for GNU Image Manipulation Program). This open source image editor can be downloaded and installed on both PC and Mac computers.
How To Install Image Software
***PLEASE NOTE*** If you are unable to use the download at gimp.org try the portable version at https://gimp-portable.com/
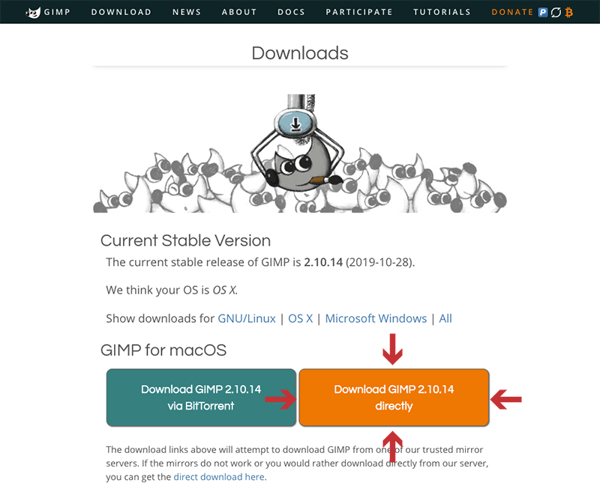
1. From the GIMP home page, or https://gimp-portable.com/ click on the orange download button.

2. From the download page, be sure the correct computer type is selected. Click the orange button to directly download the program.
3. Once the installation file is downloaded, follow the prompts to install.
How To Review An Art File
In this section, we look at a file to become familiar with the tools used. You can download the files used in this blog to follow along exactly.
For this tutorial, we want to print a full chest imprint at 10" wide. According to the art requirements, we need to make sure our file is good and clean at 10" wide, 150 dpi.
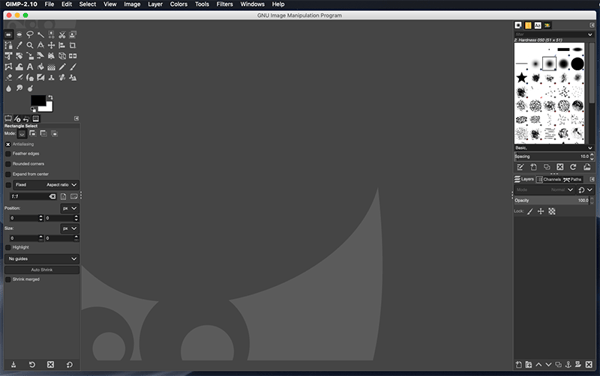
1. Open the GIMP program. Your window will look like this:
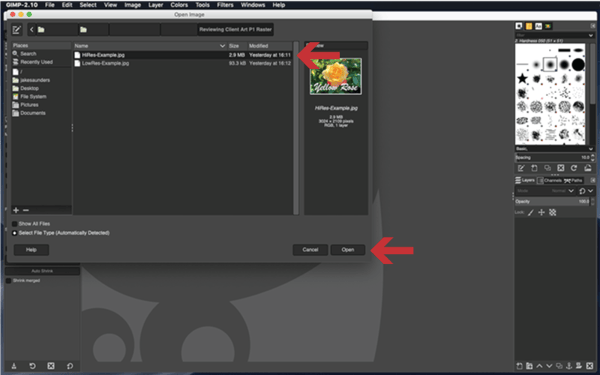
2. From the File menu, click Open.

3. Find the files you downloaded and select the file "HiRes-Example.jpg" and click Open.
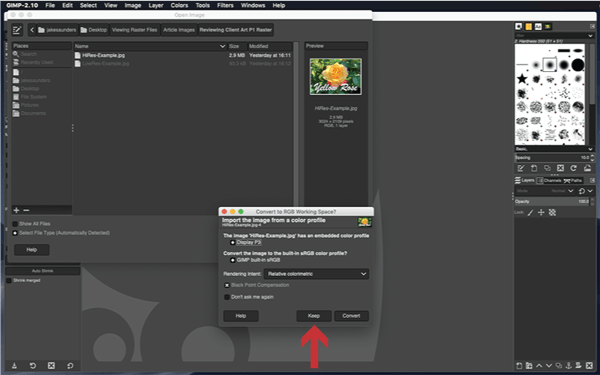
4. Before opening, GIMP gives the option to Convert to RGB Working Space. Click Keep.
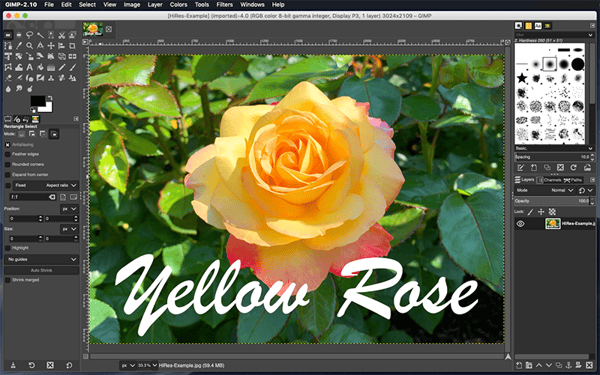
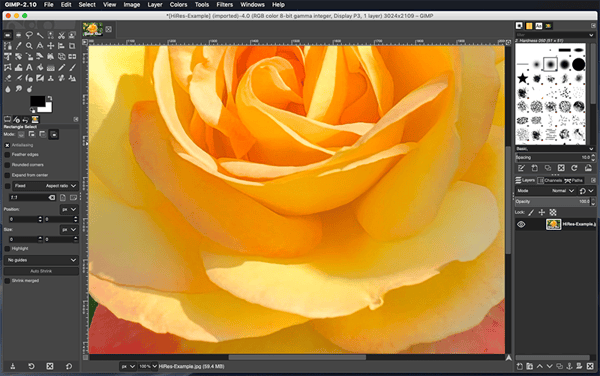
5. The image opens. We are working with a photograph of a yellow rose and some text.
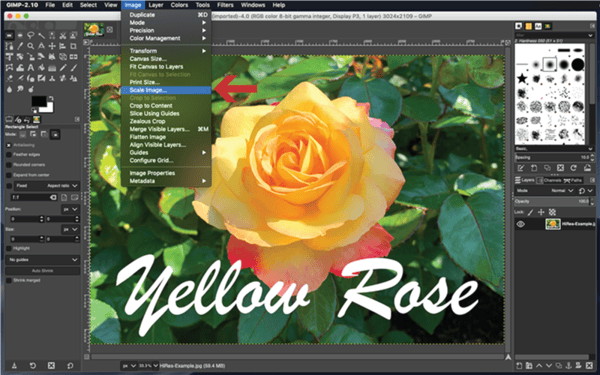
6. From the Image menu, click Scale Image.
7. A Scale Image dialogue box opens.

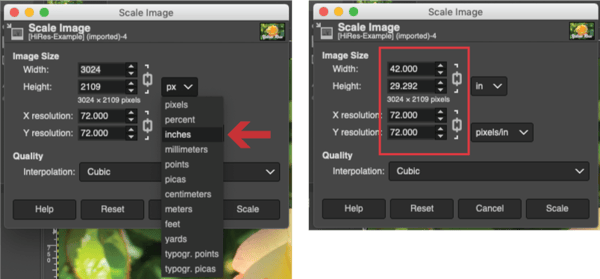
8. Let's take a moment to become familiar with the options we are working with. They are pointed out below.
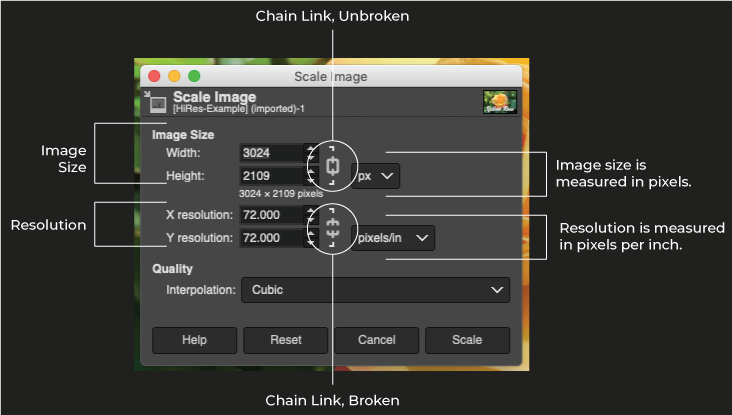
You will note:
- The image size in measured in pixels. We will convert this to inches.
- The resolution is measured in pixels per inch (ppi) and is equal to dots per inch (dpi).
- The chain links should be unbroken to make sure your image is not stretched or warped when making changes.
9. Change pixels to inches from the measurement dropdown menu. We now know that our image is 42 inches wide at 72 ppi.
10. Since our minimum resolution for useable files is 150, let’s check our image size by entering 150 as the X resolution. Be sure your chain links are unbroken, so when you click off the X resolution field the Y resolution automatically updates.
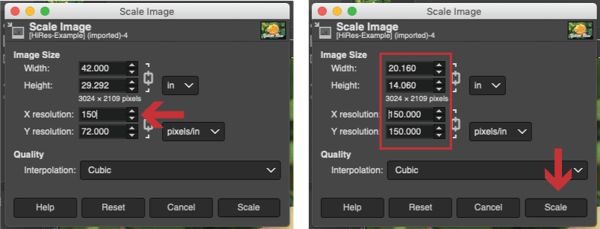
Now we can see that at 150 ppi our image is 20.160" wide x 14.060" high. This is the maximum size we can cleanly print this graphic. Since we're looking to print a full chest at 10" wide, we are looking good so far. There is just one more thing to check before we can be certain this file will produce a clean print.
11. Click Scale to close the print dialogue box with our new settings and you will return to the image.
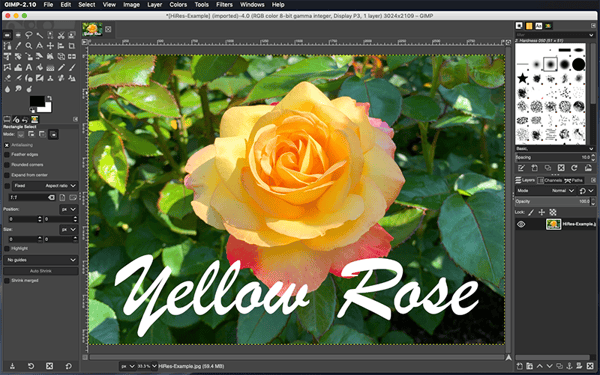
12. At the bottom of the program window, you will notice a percentage. In this example, the percentage is 33%. This is the percentage of full size we are viewing the image. This percentage changes as we zoom in and out. We know the file is good to use if it looks clean at 100%, so select 100% from the drop down menu.
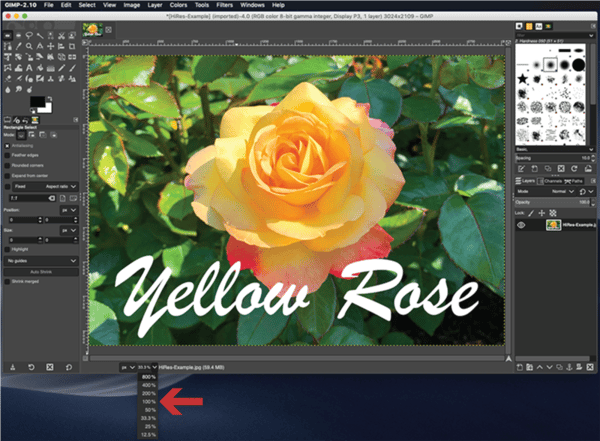
13. The image zooms in to 100%. If the file is good, the image will look clean and smooth.
14. Move the image around to make sure all areas are clean by clicking on and moving the sliders at the right and bottom of the image window. You can also do this by holding the spacebar down and moving the image with your cursor.
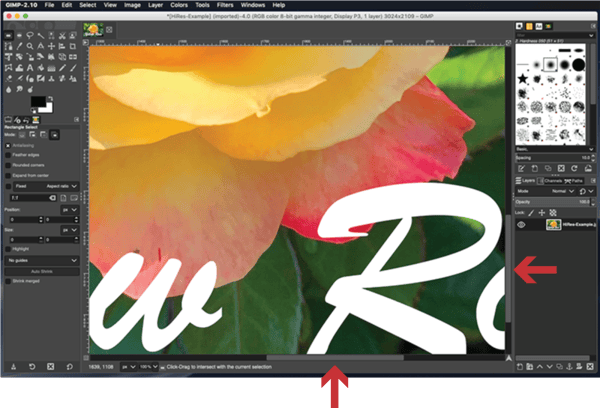 15. The image size is larger than 10" at 150 dpi and the image looks smooth and clean at 100%. We are good to use this file as a full chest imprint!
Select Close View from the File menu at the top navigation to close your file.
How To Know If A File Will Not Work
Follow steps 1-6 from above to open the Scale Image dialogue box. This time select the file "LowRes-Example.jpg".
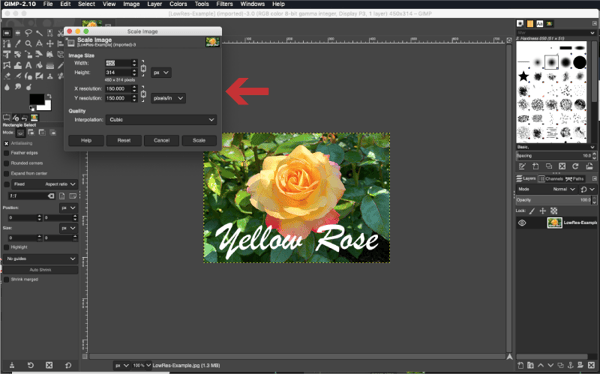
The Scale Image dialogue box tells us that the image size is 450 pixels wide at 150 ppi. Change the pixel measurement to inches and keep 150 as the resolution value. Now we know that this image is 3" wide x 2.093" tall.
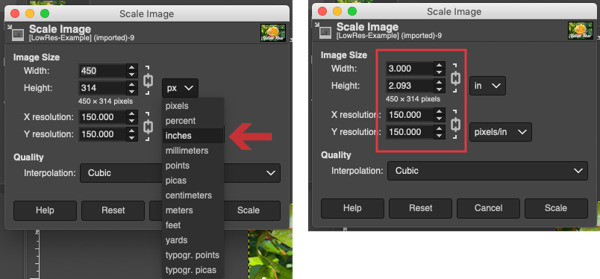
Since 150 is the minimum resolution allowable, these measurements also means that 3" wide is the maximum size we can print this art file. It might work as a left chest, but it won't work for our 10" full chest.
After going through the steps with the sample files, try some files you have available. After reviewing the files, contact your decorator to check your answers.
Resources
4 Minute Video Tutorial:
Related Blog Article:

Understanding Art Requirements & File Types For Apparel Decoration
Whether you are ordering screen print, embroidery or direct-to-garment printing, you will need one of two file types: a high resolution raster file or a vector art file. These file types work with images differently and have different guidelines for what can be used. While you don't need to be a graphic artist to order custom printed tshirts or embroidered uniforms, developing an understanding of the different file types will enable you to discuss artwork and art related issues more clearly with your client.
PDF Download:

Leave a Reply
Your email address will remain private and will not be shared.